Fence Post Holes in South Texas — Why a Track Loader Auger Saves You Time and Money
- valleystoneranch
- Jul 26, 2025
- 2 min read
If you've ever tried to dig fence post holes by hand in South Texas you know exactly how brutal it can be. Caliche hardpan, rocky soil, and dense clay make hand digging slow, exhausting, and sometimes nearly impossible.
There's a better way.
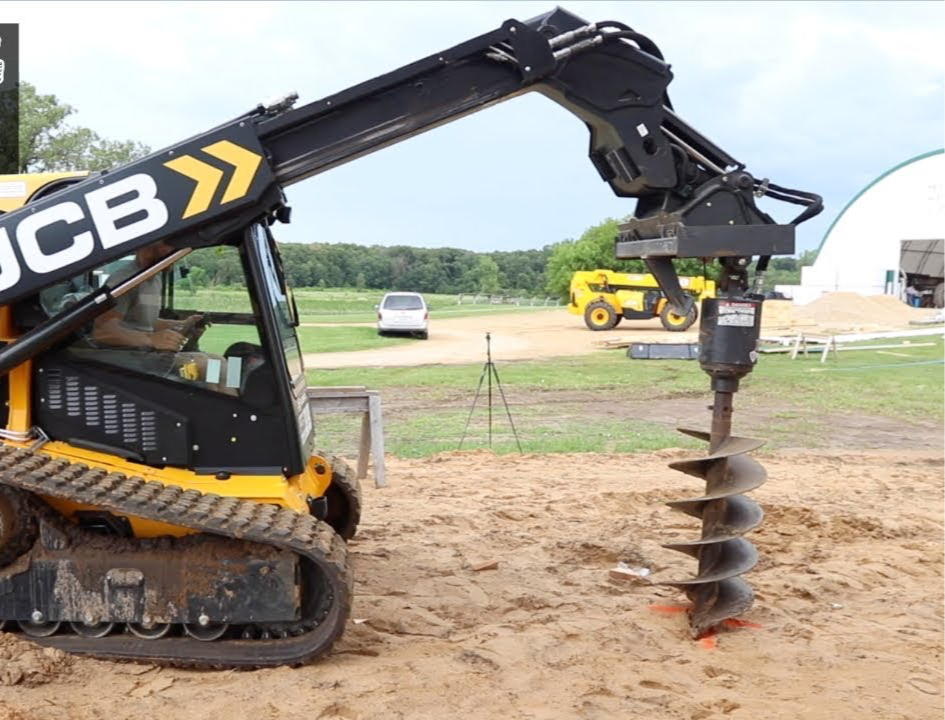
What is an auger attachment? An auger is a large drill bit that attaches to a track loader or skid steer. It drills precise round holes in the ground at a fraction of the time it takes to dig by hand. We offer 8 inch, 10 inch, and 12 inch auger bits attached to our 2025 JCB 270T Track Loader — giving us the flexibility to drill whatever size hole your fencing or construction project requires.
How much faster is an auger than hand digging? In South Texas soil one person hand digging a fence post hole can take 20 to 45 minutes per hole depending on the caliche and rocks. Our track loader auger drills the same hole in 2 to 4 minutes. On a project with 50 fence posts that's the difference between a full week of hand digging and a single afternoon of machine drilling.
What projects use auger drilling?
Ranch and agricultural fencing
Residential yard and garden fencing
New home construction support beams
Deck and pergola post holes
Livestock pen fencing
Sign post installation
Utility pole holes
What size auger do I need?
8 inch — standard fence posts, lightweight fencing
10 inch — heavier fence posts, deck posts, small support beams
12 inch — large support beams, heavy agricultural fencing, utility poles
Not sure what size you need? Call us and we'll advise you based on your specific project.
How do we handle caliche? Our track loader has the hydraulic power to push through South Texas caliche and clay efficiently. We've drilled hundreds of holes across Cameron County and Hidalgo County and know how to handle the soil conditions specific to the RGV.
How much does augering cost? We charge by the hour. Most augering jobs move quickly — meaning your total cost is often much less than you'd expect. Call or text us at (956) 274-1624 for a free quote.
Valley Stone Ranch Land Clearing & Development serves the entire Rio Grande Valley including Cameron County, Hidalgo County, and Starr County. Based in La Feria, TX.


Comments